Friday 24 June 2022

Runway inspiration

I know that I have said this about almost every class I have done for the Altenew Educator Certification Program (AECP) but I really did LOVE this one. It has given me an idea as well to start an inspiration station so that I can share my inspiration with you all and maybe it can be something for you to be able to dip into as and when you want some inspiration so stay tuned for more on that if it sounds interesting to you :D

This class is called Runway inspired card making and is by the super talented Jennifer Rzasa. As the title suggests it is all about how to use fashion as inspiration for your cards. I have had so much fun looking through Pinterest for fashion looks to adapt into cards. I have sooooooo many ideas!

For the first one I used this stunning garment by Carolina Herrera from New York Fashion Week Spring 2020 click on the image to go to where I found this photo on livingly.com 

(Spring 2020 - Source: ImaxTree)


From this I took the inspiration of the way the flowers are scattered across it and there are more clustered that then thin out. I also wanted to try and stick to the colours used of the blue, green and white. 

I drew out a very rough sketch of what I wanted to do. Sorry my sketch and scribbles are very messy lol

As you can see I also added an idea for what stamp set I wanted to use. I like the way that the vintage roses stamps have a range of sizes of roses and leaves as I thought that would fit well with my inspiration.

So after deciding on my stamp set to use I picked some blue and green inks. I went for Limeade and lime for my greens and Caribbean Sky, Persian Blue and Sapphire.

Then I went about stamping a load of roses and leaves out. 

As you can see I tried stamping some white flowers too using some Morning frost and Evening Gray inks but I didn't think it would fit and I also decided against doing any layers for the leaves and decided to just use the Limeade ink for the leaves as that fits better with the inspiration I am using. I then die cut everything out and I will save those ones I am not going to use in the stamp packet so they are ready for another project later.


Then I started laying the roses and leaves onto the card blank until I was happy with the way they looked. 

Then I used some press and seal to pick them all up and keep them in that layout while I glued them all.


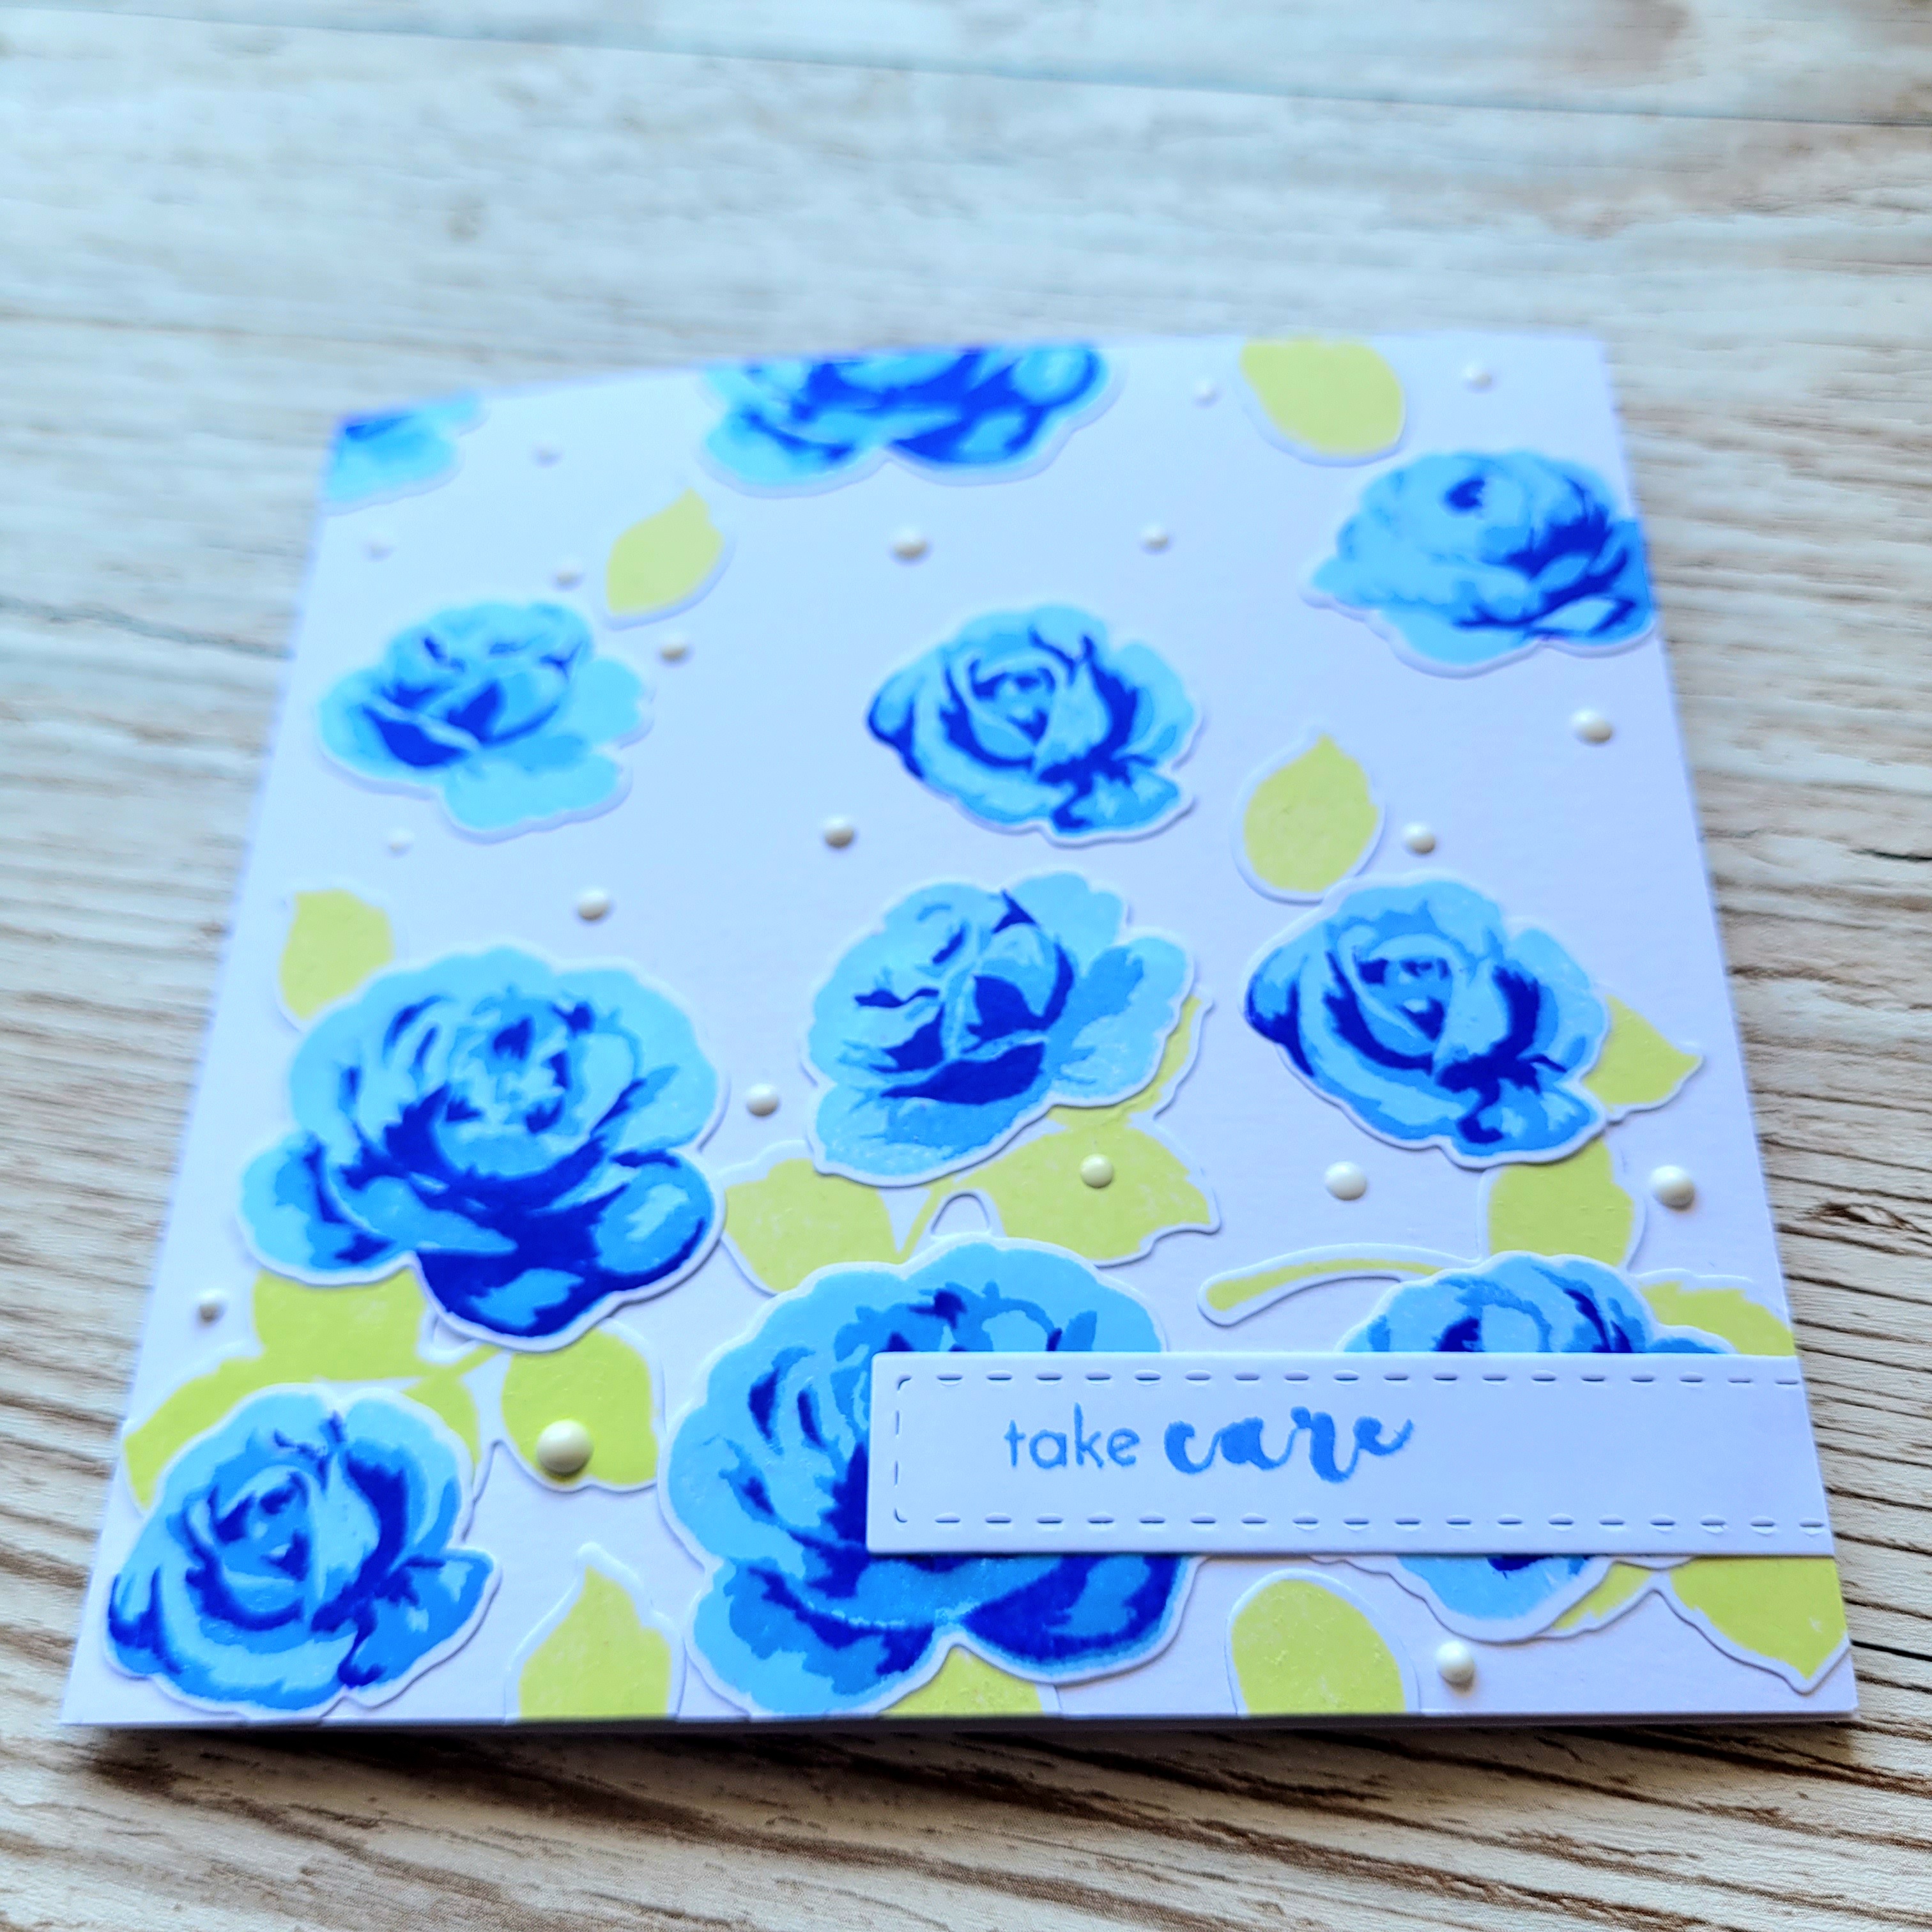
I wanted to add a sentiment without taking away from the feel of this card so I used the stitched strips of ease by Heffy Doodle to die cut a strip and then stamped a sentiment from the Inky Bouquet stamp set in Persian Blue ink so it matches the roses.

Finally for this card I wanted to add some more touches of white still so I used some Simply White nuvo drops scattered around the card which also added a nice touch of dimension.


I am so happy with the way this card turned out so I hope it has inspired you.


I am going to enter this card for the following challenges:

Crafty Gals corner - Anything Goes
Crafting happiness - Anything Goes

As you may have guessed I also have a second fashion inspired card for you today. For this next card I have combined two different pieces of clothing. The first thing that grabbed me was this fun dress from Pintelstore.com click on the image to go to the store.


I love that curve that runs down the dress and the fun colour pops so I am going to use the colours of pink, red, green, purple and yellow. Plus I will transfer that curve onto the card as well.
My second inspiration for this card comes from elle.com and these trousers that were from the ChloĆ© Spring 2013 Ready-to-Wear show. Click the image to go to the original Pinterest pin where I found this image.


I like the way that there is texture on half of the trousers and keeping it all in the same colour. So I am going to use that on my card.
Again I did a little messy sketch of what I wanted to create.


Again I am going to be using the Vintage roses stamp and die set but this time I am picking just one of the roses and doing it in five different colour ways.


To start with I got the slimline scenery die from Heffy Doodle to create that curve on some white paper. Next I die cut a lot of the leaf clusters from the vintage rose dies out of the same white card so that I could create that tone of tone texture effect that the trousers have. I laid the die cut leaves all over the curved section and then stuck them all down and trimmed any that over hung the edges of it.
I stuck the curved section onto my 5x7 card blank then found the rose stamp that I wanted to use and I used the following inks for them:


For the sentiment I used another sentiment from the Inky Bouquet stamp set in jet black ink.


I spaced the roses down along the curve in the same way that the buttons run along the curve on the dress in my inspiration photo.


I think these two inspiration photos although they look very different from each other have really worked well together for this card.

I am going to enter this card for the following challenges:

Fab and funky - Summer colours
As you like it - I have gone feminine I do love making cute and pretty cards that tend to be more girly
Cardz4gals - Die cuts or punches

These cards have been made to go towards my Altenew Educator Certification Program (AECP) level 3 I have a few more classes to go before my final assessment which will be a class. So if you would like to find out when I am am going to run my class and maybe join in with it please follow me so that you can see my future posts :)
Thank you for taking the time to look at my blog.

Huge hugs

Amy xx


Transcending Tattoos

I have had a great time doing the amazing Transcending Tattoo Techniques class by Jaycee Gasper. I have loved tattoo art for a long time and finding out more about the various styles and looking at them with the view to transfer them to cards was very exciting for me :)

I was inspired by all of the lessons but the Trash Polka / mixed media one posed me a challenge as I am not really very good at just going with the flow so I wanted to give it a go. For this style I wanted to keep the colour pallet to just red black and white. I knew I needed a big bold image as the focal point so went for the Build-a-flower Camellia stamp set

I stamped out the outline layer in black and then I used just the second layer with Crimson crisp dye ink to add some red to it. I did not want to do the standard look and so changed it up by masking off half of the flower using Heffy Doodle memo tape before adding the crimson layer. I think this adds more interest and makes the red a real pop of colour.


Next I moved onto the back ground. I inked through the Broken Chevrons stencil with Jet black crisp dye ink keeping it kind of over to the left bottom two thirds of the card. 

To add more texture and interest I then used crackling campfire Distress spray stain to flick across the back ground and add in some more of the red. 

I stamped some of the leaves from the Camellia stamp set in black to mount behind the big flower to give it a bit more dimension. For the sentiment the one in the Camellia set looked perfect for me and I stamped it straight onto the card blank on top of the stencilling using my stamping platform so I could stamp it a few times and make sure it was really crisp and black to stand out from the stencilling.

I popped the flower up on some black foam pads before adding the final touch with some Black Board vintage nuvo drops.


I am really happy with how this turned out as it was quite a step outside of my comfort zone and I think it has worked well and it has inspired me to do more. This card has been made to go towards my Altenew Educator Certification Program (AECP) level 3 I have a few more classes to go before my final assessment which will be a class. So if you would like to find out when I am am going to run my class and maybe join in with it please follow me so that you can see my future posts :)


I am going to enter this card for the following challenges:

Crafty Gals corner - Anything Goes
Paper funday challenges - Anything Goes with option of masculine
Crafting happiness - Anything Goes

Thank you for taking the time to look at my blog.

Huge hugs

Amy xx

Wednesday 15 June 2022

Feeling zen

 This is the first class that I am completing towards level 3 of the Altenew Educators Certification Programme (AECP)

I have been looking at zentangle from afar for ages so this Zentangle for card makers class seemed like the perfect chance to learn about it. 

I have had so much fun. I never knew there are set designs to use when zentangling known as tangles. I always thought that you just completely made them up. It was so nice to have some designs to learn and use which I could then make some of my own to go with once I felt more confident. These are some of my practice tangles based on the tangles that I learned during the course.


Some felt easier than others to me and I am sure I will get better at them all the more I do. It is fun learning šŸ˜€

For this card I used the trigonometry die set. I traced around the dies to create the shapes to tangle in. I was inspired by a card that the awesome teacher Amber Davis made in the class using the trendy circles stamp set. 


I wanted to keep the colours limited so that the tangles were the main focus. I used Altenew artist alcohol markers Frayed Leaf (G702), Forest Glade (G715),Ocean Waves (B201), Dusk (B313) and a pencil to add some shading and depth. You can get all of these Artist markers and more in the Artist Alcohol Markers set A.
 

For my tangling I used Fine liner pen set from Altenew in size 01 and for the thicker line on the main triangle I outlined the border and then used the Brush marker in the fine liner set to fill it in.


I originally traced the triangles in a formation flat on a panel and tangled on them intending to just add the whole panel to the front of the card base but changed my mind and cut them out so I could pop them up on foam pads to give extra dimension. 


I am entering this card for the following challenges:
Use your stuff - Triangle
Crafty Calendar - Anything Goes
Less is More - CAS masculine
Dare 2B Artzy - Anything Goes


I had so much fun making this card I also made a second card for this class that I wanted to show you.
For this card I again used the Altenew fine liner 01 size for my tangling but this time I left my tangles black and white. I added my shading with pencil and blended out with a blending stump. 
I started by creating the swirl on my card panel using the Illusion Twist stencil and then ink blending with Frosty Pink, Coral Berry and Ruby Red crisp dye inks. Again this card was inspired by another card created during the class and it made me look at all my stencils in a different way. 


To finish the card off I cut down the stencilled panel to just be a strip on the edge of my card and layered that on some black card. I cut a further piece of black card to heat emboss, with Wow white embossing powder, the "Thank You" sentiment from the Wonder Clusters stamp set.
Finally I added some Black board vintage nuvo drops to add a bit more texture to the card.


I am going to enter this card for the following challenges:

Crafting Happiness - Anything Goes
Pammie's Inky Pinkies - Anything Goes
Corrosive challenge - Anything Goes

Thank you for taking the time to look at my blog.

Huge hugs

Amy xx

Monday 6 June 2022

Playing with Nuvo shimmer powder


I had so much fun creating this card. Colouring up this stunning Digi stamp from Sweet November Stamps called Skipper Openwater. I coloured her with the following copic pens:

Tail: YR18, YR16, Y17

C7, C5, C3, C1, C0

Hair: C9, C7, C5, C3

Skin: E59, E57, E55, E53

Plus I made her tail sparkle with a Spectrum noir sparkle pen :)

This video shows how I made this amazing sparkly and fun background using Nuvo Blue Blitz and Atlantis Burst shimmer powders.


The sentiment is from another Sweet November Stamps set this time it is a clear set called Spring Fairies.


I am going to enter this card for the following challenges:

Crafting Happiness - Anything Goes
Pammie's Inky Pinkies - Anything Goes
Corrosive challenge - Anything Goes

Thank you for taking the time to look at my blog.

Huge hugs

Amy xx


I did it! Level 2 complete :D


I am so over the moon to be able to say that I have passed the level 2 AECP final assessment so now am going to be working on my level 3 classes. I can not wait to get going. There are so many awesome online classes available the hardest part is going to be choosing which 5 to take for this stage :)
Thank you all so much for your support this far it means the world to me.